7.1
Gluing the glass panes onto the wooden frame
7.1.1
Preparations:
| 1 |
0:00 |
The wooden frames already have one or two holes in the front and the rear;
these allow the compensation of humidity and air pressure between the two panes when the cooker is heating up. To avoid insects entering through
these holes, they are plugged with either synthetic material that is permeable to air or with mineral wool as shown in the picture |
| 2 |
0:08 |
Before gluing, sand the frame and remove any dust with a rag |
|
|
7.1.2
The glass panes
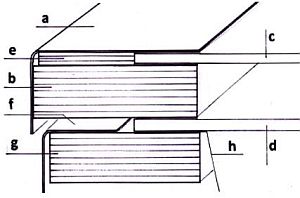
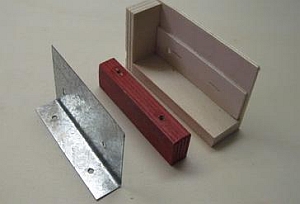
The wooden glass frame b is protected against rain and sunshine by the metal frame a
3 mm float glass panes (window glass) are glued onto the wooden frame from both sides with silicone.
Dimensions of the panes
- Ls 2 Panes 560 x 560 mm
- Lw 4 Panes 560 x 460 mm
The production of the wooden glass frame is described in Appendix C, Sect. 1.
|
 |
7.1.3
Gluing the panes
7.1.3.1
Gluing the lower pane
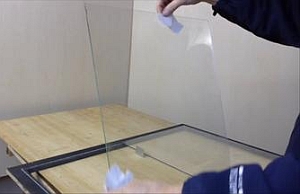
| 1 |
0:00 |
Clean the panes from both sides in a dust free environment and put them aside for later use |
| 2 |
2:05 |
Place the guiding frame Jig 7.1 onto the black side of the glass frame and apply silicone using the nozzle guide Jig 5.2 |
| 3 |
02:41 |
For sides 3 and 4 Jig 7.1 is shifted to the other end |
| 4 |
3:28 |
Fence strip Jig 7.2a helps with placing and adjusting the pane. Use a wooden block to press the pane down until the silicone is sealing all around |
|
 |
7.1.3.2
Gluing the upper pane
Before the upper pane is put on, check both panes for any dust. This is best done by placing a black sheet of cardboard under the panes
| 1 |
0:00 |
When the silicone underneath the first pane has set, check both panes for dust again using a sheet of black cardboard |
| 2 |
0:23 |
Apply silicone to the other side of the glass frame and fix the second pane |
Hint: There are some additional points to consider when gluing the panes for the Lw
They are outlined in Divergences for Lw at the end of this section
|
|
7.2
Bending the metal frame before fitting it
In Sec. 2.2 the production of the parts of the metal frame was described.
This process continues here
|
 |
 |
|
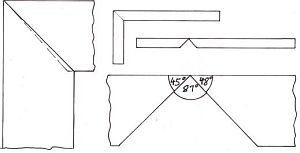
| 1 |
0:00 |
Cut out the triangles already marked
Trick: The angle of the shorter part is 45° while the angle of he longer one is 48°. When bending,
the front part overlaps the side part, thus giving the impression of a tight 90° mitre |
| 2 |
0:51 |
Set Jig 7.3 on an even base and bend the side parts |
|
|
7.3
Fixing the metal frame on the wooden glass frame
7.3.1
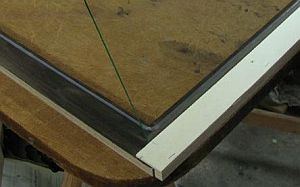
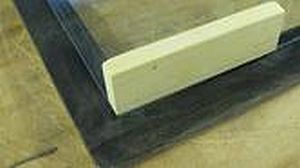
Fixing plywood strips on the upper side to level it.
Trimming the corners
| |
- |
4 mm plywood strips e are placed all the way around the upper glass pane c
Note: These strips jut slightly above the glass. This way their edges give guidance when applying silicone. - See Clip 7.5 0:20
|
| |
- |
Trim the four corners of the wooden frame using a hacksaw (No video clip) |
|
 |
7.3.2
Auf Glasrahmen Ausgleichsleisten anbringen und Ecken beschneiden
| 1 |
0:00 |
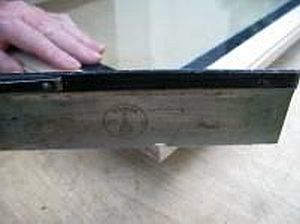
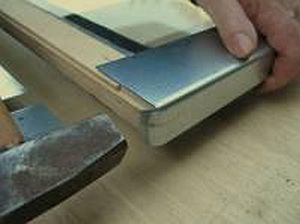
Place the rear part of the metal frame on the wooden glass frame and check its length. It must be 2 mm shorter on both edges. Screw on the frame part using silicone; the lightly protruding plywood strip serves as a guide. Use a hammer to bend the outer flaps of part 7 sideways. |
| 2 |
1:23 |
Check if the left frame fits: it should form a recess of 2 mm at the back end. |
| |
- |
Put on the right side parts test wise (no video clip) |
| 3 |
1:50 |
Place the glass frame cover 10s as a test.
(Error in the parts 6s L and 6s R: the front parts should be slightly longer, so they almost touch.) |
| 4 |
2:02 |
Apply silicone all around |
| 5 |
2:22 |
Fasten the left glass frame part with a screw No 8 |
| 6 |
2:35 |
Drill the remaining holes for the left side and attach additional screws |
| 1 |
0:00 |
Fasten the right part of the metal frame with just one screw |
| 2 |
0:11 |
Drill all missing holes |
| 3 |
0:27 |
Fix the back right screw. N.B.: The corner of the side part will lift |
| 4 |
0:52 |
The second screw will press it down again.
(Error: The holes for the second screw had been forgotten when producing the metal frame. They are marked on the template for the side parts.) |
| |
- |
Set all remaining screws of the right part now. (no Video-Clip) |
|
 |
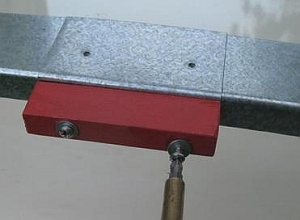
7.4
Fixing the handle to the glass frame
| 1 |
0:00 |
Drill holes into the handle using Jig 7.4a |
| |
- |
Fill the gap between the two halves of the metal frame front part with silicone (no video clip) |
| 2 |
0:38 |
Drill 4.2 mm holes through the holes of part 10s into the metal frame, using drill stop Jig 7.5 |
| 3 |
1:08 |
Then drill 2.5 mm holes through the screw holes in the wooden frame |
| 4 |
1:30 |
Fix the handle from the side with screws No 10 and washers No 13 |
| |
- |
Use drill stop Jig 7.5 to drill 4.2 mm holes for the upper screws (No video clip) |
| 5 |
1:54 |
Fix cover plate No 10 with screws No 8 |
|
 |
7.5
Mounting the hinges for the glass frame
Vorbemerkung:
In Sect. 3.3 it was explained, that reinforcing plates are to be stuck against the back panel of the outer box.
These are to give better hold to the hinges of the glass frame (see Clip 3.9)
For the Ls, two hinges are riveted to these reinforced areas (The Lw needs three hinges)
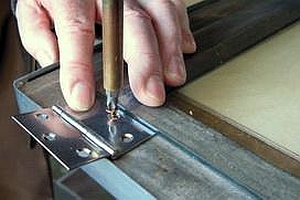
7.5.1
Screwing the hinges to the glass frame
| 1 |
0:00 |
Place the hinges No 19 to be screwed: About 90 mm from the side edge and 3mm from the back edge (set the hinges with a piece of 3mm plywood). Prick a hole in the middle of one of the holes of each hinge |
| 2 |
0:48 |
Use a 2.5 mm drill and then fix with screw No 6a |
| 3 |
1:35 |
Align the two hinges, prick the other holes in the same way and set the remaining screws |
|
 |
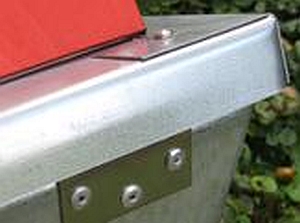
7.5.2
Fixing the hinges to the back of the box
| 1 |
0:00 |
Place the glass frame on top of the cooker. |
| 2 |
0:09 |
Mark one of the holes of each hinge with a small circle. Punch the centre of the circle with a steel nail and then drill,
starting with a 2.5 or 3.2 mm drill, then finish with a 4.2 mm drill (Using a 4.2 mm drill immediately would cause the drill to slip off, even if the hole was punched) |
| 3 |
1:07 |
Set rivets No 3 into both holes and open the frame for testing. |
| 4 |
2:00 |
Drill the remaining holes using a 4.2 mm drill and set the rivets |
|
 |